Location:
Radnor Hunt Concours d'Elegance, 2013
Owner: Simeone Foundation Automotive Museum | Philadelphia, Pennsylvania
Prologue:
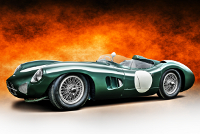
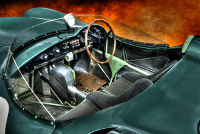
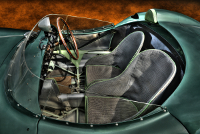
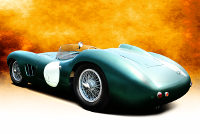
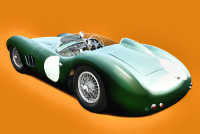
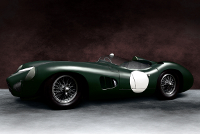
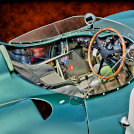
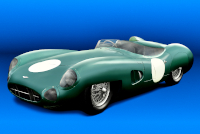
Anything Aston Martin we publish exists for the sake of the DBR1, the car that placed the marque on the top pedestal of international competition. An exercise in shape and color, half our gallery consists of quarter perspectives, yet I could happily add more (were they available). At a basic level, the chance to see a DBR1 is special to start with. The rest comes down to presenting a worthwhile overview. Note that Photo 10 uses a taller perspective on DBR1/3 to depict the car as raced at Le Mans in 1959, though the details mimic those of DBR1/2.
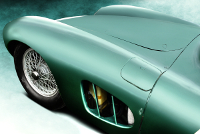
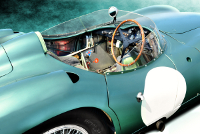
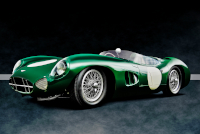
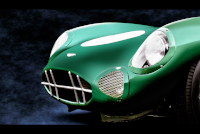
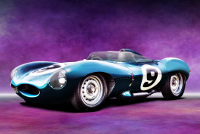
Approaching a modest Aston portfolio, I redressed this profile with a couple photos from E. The first is a rather classic quarter perspective (11), and the second is a ground-level nose detail (12). The nose detail resembles a very similar snap of the Talbot-Lago T150-C S Cabriolet, so I expanded the canvas by the same proportions, (which, with the old sensor, equals 11.7 MP). Also note that the false-medium shot (9) is its own separate photo, slightly tighter than the exhaust-side flank photo (8).
- - - - - - - - - -
► Image Source 1-10: Nikon D600 (24.3 MP) | Image Source 11-12 by E, illustrated by the author: Nikon D200 (10.2 MP)
References:
- Bailey, Stuart. "Cutting Edge Conversations, EJ 'Ted' Cutting" Acorn Books, UK. 2019
- Noakes, Andrew. "Aston Martin DB, 70 Years" Quarto Publishing, London, UK. 2017. (Revised edition: White Lion Publishing, 2019) page 71-81
- Nikas, John. "Rule Britannia, When British Sports Cars Saved a Nation" Coachbuilt Press, Philadelphia, PA. 2017, page 76-81
- Simeone Foundation Automotive Museum: Read history and information about DBR1/3, as told by the owner.
- Video: A short clip of the 1958 Nürburgring includes a beautiful view of Moss working an opposite-lock right-hander in this, the winning car.
- Supercars.net: The site provides a concise development history, and a nice gallery.
- UltimateCarPage: With photo galleries and quips on four different DBR1 chassis, (though without information on DBR1/3), by Wouter Melissen, May 14, 2012.
The culmination of David Brown's pursuit of international sports car dominance, the DBR1 project made good in 1959, winning the 24 hours of Le Mans and scoring enough points to help Aston Martin win the manufacturers championship. At that point, (during his speech following Aston's world championship victory, in fact), David Brown announced his firm's retirement from team-sponsored sports car competition, shifting all racing development to Formula 1.
Aston Martin developed the DBR1 as early as 1956, and yet improved the project through just four works examples. Running just four cars—supported sporadically by a fifth, and lone, privately owned DBR1—underscores the scale of Aston Martin operations, and the rather large task of winning against very well developed efforts from Ferrari and a German upstart from Zuffenhausen. Help arrived in the form of sporting regulations that limited capacity to 3 litres, which retired Jaguar's D-Type, but not Ferrari's 250 Testa Rossa. Help also came from older DB3S cars that were rapid and reliable enough to fill points-paying spots, if not quick enough to take outright victory. But on the whole, Aston Martin achieved a lot with very few resources.
DBR1/3, the 1958 Nürburgring Victory, and the Fire at Goodwood
This example, Aston Martin DBR1/3, won the 1,000 km race at the Nürburgring in 1958, driven by Stirling Moss and Jack Brabham. This victory would be the car's top contribution to the works team that season, followed by third in the Goodwood Tourist Trophy later that year courtesy of Carroll Shelby and Stuart Lewis-Evans.
With so much written about the DBR1 at Le Mans, we should pause a moment to comment on the 1958 Nürburgring victory. Ferrari would that year place second, third, fourth, and fifth with all four of its works 250 Testa Rossa cars. Moss and Brabham managed to slip into first by a margin of 3 minutes, 44 seconds, with Stirling Moss lapping the circuit faster than Mike Hawthorn's qualifying lap that had landed his Ferrari in pole position. Aston Martin had added Moss to the works team in 1958, (along with Carroll Shelby). And while we know Shelby would win Le Mans with Roy Salvadori a year later, Moss would contribute many crucial drives for the factory.
Moss provided the main driving effort for the 1958 Nürburgring win, served the all-important rabbit role that broke Ferrari for the 1959 Le Mans victory, and in the final round of 1959 season, Goodwood, gave Aston Martin its first World Championship. After leading much of the race, a pit disaster set the Moss/Salvadori car in flames, giving the lead to Porsche. Team manager Reg Parnell pulled in the number two Aston and replaced Jack Fairman with Moss, who sprinted down the 718 RSK to snatch first by a margin of about 30 seconds.
In 1959 the car caught fire at Goodwood, pictures of which can be found online. Jim Clark then campaigned the car throughout 1960, placing a notable third at Le Mans that year. As with most of the DBR1 cars built by Aston Martin, DBR1/3 continued to race through the early 1960s. That all four works cars survived, given motorsport's high attrition rate, remains remarkable.
DBR1 Characteristics and the Chance to Win Le Mans
The strength of the DBR1 rests in its power-to-weight ratio, providing a directness of handling response that gives the car quickness and roadholding. Aston Martin realized the car's potential once replacing the original 2.5 litre motor with the 254 horsepower 2.9 litre unit. A one-two finish at Spa in 1957, and back-to-back wins at the Nürburgring 1,000 kilometers in '57 and '58, identified the 3-litre DBR1 as a superior machine on road circuits. But of course victory at the Nürburgring did not necessarily translate to Le Mans, which required outright speed, durability, and strategy.
When in 1958 international sporting regulation capped motor capacity at 3 litres, Aston Martin landed in decent position for a run at Le Mans. The capacity limit ended Jaguar's three-year reign with the D-Type, and positively stopped Maserati's charge with the 450S, arguably the fastest and most powerful sports racing car of the time. The change also ended Aston's development of the 3.7 litre DBR2, which would have taken the fight to Jaguar's late series 3.8 litre D-Type. So Aston Martin relied on the DBR1, whose main competition was the Ferrari 250 Testa Rossa.
The Ferrari is slightly lighter than the Aston and, thanks to its single overhead cam V-12, produces about 50 horsepower more. The Aston is perhaps more mechanically advanced. But, because of Aston's withdrawal following the 1959 season, only '58 and '59 would see the two firms battle head-to-head. The nod in 1958 went to Ferrari, with Olivier Gendebien and Phil Hill winning over a privately entered Aston Martin DB3S.
For victory at Le Mans, particularly against Ferrari, the DBR1 would need to add speed. The works team developed streamlined versions out of chassis #2, #3, and #4. And so, with a sprinting rabbit strategy dutifully fulfilled by Stirling Moss and Jack Fairman in this car here, chassis #3, the team pushed Ferrari into mechanical failures, sending Carroll Shelby and Roy Salvadori to win the race outright in chassis #2. I included a depiction of the Le Mans configuration in this set, as each of the three chassis fitted with streamlined fairings for Le Mans subsequently returned to their original bodywork.
Motor: 2,992 cc straight 6-cylinder, aluminum block and hemi-head (type RB6.300) | 84 mm x 90 mm | 9.3:1 compression
Based on the DB3S LB6 motor, the RB6 uses a revised alloy block, replacing Willy Watson's barrel-type crankcase for a more conventional (and reliable) layout. Ted Cutting, chief designer, and Glen Liversedge designed the motor, working from full-scale drawings in the interest of time. Ted Cutting created a dry sump block, mounting oil pumps on either side with a magnesium pan about two inches deep. The dry sump RB6 motor is unique to the DBR1. Cutting specified the bearings would be made of duralumin, an aircraft-grade alloy, and drop-forged. The motor originally ran with four main bearings to reduce friction and increase power, but race director John Wyer asked for a more reliable seven main bearing update, which Cutting agreed gave the car the durability required to win. Reg Frankis contributed to the seven bearing update. That said, for the Le Mans run in 1959, chassis DBR1/3 used one of the original four bearing RB6 blocks, allowing Moss and Fairman to push Ferrari in the early stages of the race. The winning car of Shelby and Salvadori used a revised seven main bearing RB6 motor.
Valvetrain: DOHC, 2 valves per cylinder, chain-driven
Aspiration: triple Weber 45DCO carburetors
Power: 254 bhp at 6,250 rpm
The first iteration of the RB6 produced 240 bhp. Maximum output arrived with the introduction of a revised cylinder head.
Drivetrain: 5-speed gearbox with straight cut gears, transaxle rear-wheel drive layout
The David Brown CG537 transaxle combined the gearbox and final drive. Though Aston were known for reliable gears under race conditions, the transaxle layout proved problematic in early stages. John Wyer, racing director, specified the transaxle from the start of development. Aston built the prototype from aluminum, and all subsequent units from magnesium; these were bored out and drilled for weight reduction.
Front Suspension: independent with torsion bar and trailing arms
Rear Suspension: independent de Dion axle with trailing arms and Watts linkage
Architecture: steel tubular perimeter space frame with 18 and 20-gauge magnesium alloy panels
Early ideas involved a backbone design built around the drive shaft, which had been conceived for a V-12 car discussed between Ted Cutting and Willy Watson. However, Cutting determined a perimeter space frame would better suit a lightweight car with an all-alloy 6-cylinder. While the DBR1 uses an update of the DB3S LB6 motor, the car itself is very much a clean sheet design. Separately, the backbone V-12 chassis concept became the DBR2, with Tadek Marek's 3.7-litre 6-cylinder. Aston Martin developed the DBR1 and DBR2 in tandem, but Cutting emphasized that each is its own project; neither leant much in the way of ideas to the other, apart from the same reference point, which was the successful DB3S.
Kerb Weight: 800 kg (1,764 lbs)
Wheelbase: 2,286 mm (90 inches)
0-60: about 6.5 seconds
Top Speed: at least 250 km/h (about 155 mph)
Etymology:
The 'DB' designation appeared in the post-War revival of Aston Martin under its new owner, David Brown. 'DBR' naturally stands for David Brown Racing, which speaks to the marque's pursuit of international motorsport victory. Initially, the automaker pursued sports prototype racing, then shifted to Grand Prix racing after 1959. The '1' designation refers to the first dedicated sports car under this new DBR designation, although it is not the first Aston Martin sports prototype of the post-War era. The first post-War prototype program comprised the short-lived DB3 and better developed DB3S, the immediate predecessor and running mate of the DBR1. But, with the DBR nomenclature in place, the old DB designation would be used for road cars henceforth. I have added the Nürburgring reference to note that this car, chassis DBR1/3, won the 1958 edition.
Figures:
Aston Martin built four DBR1 cars for works racing through the 1958 and 59 seasons. With these four cars—supplemented by the still effective DB3S—Aston Martin won most of the major European sports car events. Chassis designations are simple: DBR1/1, DBR1/2, DBR1/3, and DBR1/4. Aston completed a fifth chassis in 1959, DBR1/5, which raced under private ownership. All chassis are accounted for. The car depicted here is DBR1/3. The tenth photograph recreates the DBR1 as it appeared during the 1959 Le Mans 24 hour race. These cars were returned to their original, non-streamlined configuration sometime after Le Mans competition.
Superlative Discussion: Addressing Design Precedent and the Aston Martin DBR1
About those folk who chat about the most beautiful sports cars, the DBR1 often enters discussion. But like most Aston Martin cars of the post-War era, (and English cars in general), the design amalgamates a number of continental influences. Most notably, DBR1 proportions are similar to the Grand Prix Mercedes-Benz W196R Stromlienenwagen of 1954. Both share long bonnets, extra-low lines, and beautifully curved haunches; these are not only common streamlining cues, but clothes for very similarly engineered automobiles, both given to the extensive use of magnesium in the body and major mechanical components. The DBR1 would also fit nicely within the artistic development of Scaglietti-bodied Ferrari sports racing cars from 1955 to 1957. Whereas its predecessor, the DB3S, imparts subtle cues evolved from the pontoon-fender Testa Rossa, the DBR1 could be a more advanced alteration of the scintillatingly pretty Ferrari 500 TRC. Whichever influence contributed to the lines, and in whatever quantity, the result is (in superlative terms) one of the best examples of 1950s sports prototype curves.
Metallic Beauty: The Influence of Almond Green Paint on Aston Martin Popularity
Apart from curve and line, the DBR1 metallic green paint—a light emerald with hints of sea blue—makes the car an effortlessly dazzling picture. Not like the flag red cars of the Italians, or the metallurgic finishes preferred by the Germans, Aston Martin's choice of color long favored the subtlety of prettiness rather than the impact of high contrast chromatism. To my eye there are many comparable designs, just that few benefit from such a good palette.
British Icons: Comparing the Importance of the Aston Martin DBR1 and Jaguar D-Type
Tempting to compare the DBR1 with the Jaguar D-Type, these cars could not compete at their respective best due to motor regulations. But the flavor of the DBR1 contrasts the D-Type. The Aston represents prevailing sports-racing trends, albeit the best ideas yet tested in the post-War era, whereas the latter departed in search of new territory. Even though the D-Type won Le Mans earlier in the decade, its monocoque design and beautifully rounded body are better indicators of the decade to follow—a car ahead of its time, whereas the DBR1 is resolutely of the moment.
Chassis DBR1/3: Differences among DBR1 Chassis and the DB3S
All five DBR1 chassis bear slight differences. Notably, the arch and extension of the tail seem to change, becoming perhaps narrower, more rounded, or more compact. These lines pull the design toward a toothy dagger at the grille, whereas certain angles downplay the low, sleek aspects of the car, and rather evoke the compact proportions of the DB3S. Upon first seeing DBR1/3, Fred Simeone commented, "It was lower, sleeker, and smaller than I had thought," a sentiment I think speaks to the trick of the car's long lines.
Because of its low stance, we might believe the DBR1 is longer, even bigger, than the spritely DB3S. In fact, the DBR1 is small and extremely light. Furthermore, even if these cars left Newport Pagnell with greater discrimination for accuracy, they were the most important cars Aston Martin campaigned. Regularly rebuilt with different body configurations and mechanicals, three of which were reconfigured for Le Mans in 1959, only a marque expert could now say which set of proportions best represents Ted Cutting's original intent.
The long bonnet and continuously rolling wave along the shoulder create an elegant profile. The DBR1 design truly does look beautiful from every angle, again, strongly reminiscent of the Mercedes-Benz W196R Stomlienenwagen. The driving position, nestled in the wave of the haunches, sweeps backward and throws the driver's legs outward toward the floor-mounted pedals. Ted Cutting designed the DBR1 on lightweight principles and directness of power, its handling meant to resolve changes in direction with comparatively little effort in the turn of the wheel. For this reason, the DBR1 excelled at Spa and at the Nürburging early on, yet needed cunning strategy and significant modification to succeed at the high speed game of Le Mans.
Le Mans: Illustrating Streamlined DBR1 Modifications for the 1959 Le Mans 24 Hours
The tenth photograph in this set replicates the Le Mans configuration of chassis DBR1/2, DBR1/3, and DBR1/4, tending to the details of the winning car, DBR1/2. Having acknowledged some differences in bodywork between examples, I tried to mitigate these differences in the course of altering DBR1/3. Alterations begin with the grille, which moves inside the mouth, removes part of the horizontal span, and includes a mesh insert. The lower set of driving lights does not use wire guards, but clear lens covers. The front wheel arches are skirted by about one third, and completely integrated with the front wings. The rear fenders wear half-skirts, allowing access to the knockoff wheel hubs.
The car sometimes raced with a windscreen wiper, but it was pulled for Le Mans. The side windows were replaced to form a continuous shield around the cockpit, and a tonneau cover placed over the passenger seat. The works team smoothed over the crests on the haunches, and how these scoops were first removed and then reopened might have affected the shifting aspect of the car's curves, and how each one looks today.
Lastly, the rearview mirror on each of these cars rested inside the cockpit for Le Mans, below the height of the windscreen, where it has been returned in the illustration. That said, I hope you enjoy a glimpse of what the Le Mans winning DBR1 might have looked like in the photo studio.
Last Updated: Mar 26, 2025

